The digital amp modeling market is a wild place right now. For the last decade, we’ve been told that to get a decent recorded guitar tone, we either need to spend two grand on proprietary hardware or drop an embarrassing amount of cash on closed-ecosystem plugins that eat your desktop’s CPU alive. Then along comes Neural Amp Modeler (NAM)—an open-source project that casually delivers 99% accuracy to the original analog gear, for absolutely free. It’s almost offensive how good it is.
If you’re the kind of player who enjoys soldering your own copper cables, wiring up a custom 100W Plexi clone in the shed, or obsessing over the exact resonant frequencies of a Marshall 1960B cabinet, NAM is going to completely derail your productivity. Instead of writing that bridge section for your band’s next gig, you will spend your evenings downloading captures of obscure boutique amplifiers and running your ES-335 through them.
Here is the definitive Beer & Guitars guide to installing, configuring, and actually understanding Neural Amp Modeler, along with the answers to the questions everyone seems to be asking Google. Grab a pint. Let’s get into it.
What Actually is Neural Amp Modeler?
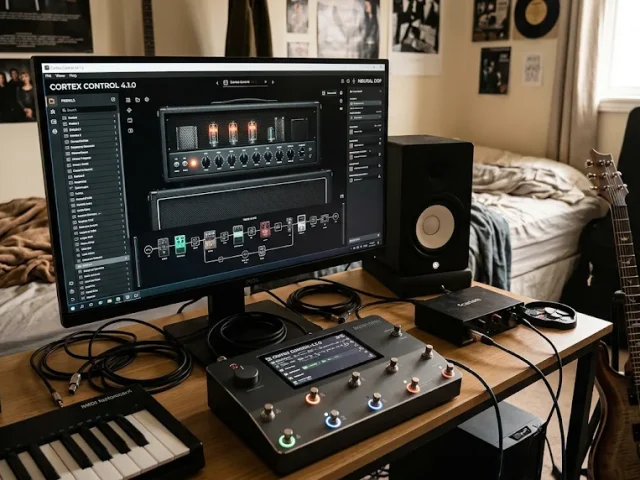
At its core, NAM does exactly what a Kemper or an IK Multimedia ToneX does: it analyzes a real, physical amplifier or pedal and creates a digital model that reproduces its behavior.
The difference lies in the philosophy and the underlying technology. NAM uses an open-source neural network trained on a specific piece of gear’s input-output relationship. You feed an amplifier a meticulously designed test signal, record what comes out the other end, and the neural network calculates the mathematical relationship between the two. The resulting .nam file captures the gain staging, EQ shaping, and harmonic distortion of the original gear with terrifying accuracy.
Recently, the ecosystem upgraded to Architecture 2 (A2), developed by TONE3000 in partnership with NAM’s original creator. The A2 models come in two flavors:
- A2-Full: The maximum-accuracy version built for pro-audio contexts like your DAW, requiring decent processing headroom.
- A2-Lite: A highly optimized version designed for processing-constrained devices, allowing this tech to run natively on embedded hardware and multi-FX pedals without sacrificing the core tone.
Both A2 architectures routinely beat commercial modelers in blind listening tests, proving that you don’t need a massive marketing budget to achieve top-tier audio engineering.
How to Install NAM
Because NAM is a lean, open-source project, there is no bloated download manager or DRM authorization app running in the background. It is just a plugin.
For Windows and Mac
- Head over to the official Neural Amp Modeler GitHub page and grab the latest release installer for your operating system.
- Run the installer, which will drop the VST3, AU, or standalone application into your default plugin directories.
- Open your DAW (whether that’s REAPER, Cubase, or Logic) and rescan your plugins.
For Linux (Because Tinkering is Fun)
If you run a lean setup and want to compile this on a Debian-based system, you’ll need to grab the mikeoliphant/neural-amp-modeler-lv2 build.
- Install your build dependencies (
build-essential,python3, etc.). - Extract the downloaded LV2 plugin bundle and drop the
.lv2folder directly into~/.lv2. - In REAPER, go to Options > Preferences > Plug-ins > LV2, manually add
~/.lv2to the scan paths, and run a full plugin scan.
Setting Up Your Signal Chain
NAM is a loader. On its own, it produces absolutely zero sound. If you slap it onto a track without loading a model, you will just hear silence (or your dry DI signal, depending on your routing).
1. The Clean DI
Your guitar tone is only as good as the raw signal entering your interface. Plug your guitar directly into the Hi-Z/Instrument input of your interface. Watch your gain staging. NAM profiles are trained on specific signal levels; if you slam the front of the plugin with a clipping DI signal, the model will compress and saturate in ways the original physical amp never did. Set your interface gain so that hard picking leaves plenty of headroom. You can always adjust the input dial inside the NAM plugin itself if a specific model feels under-gained.
2. Loading the Model
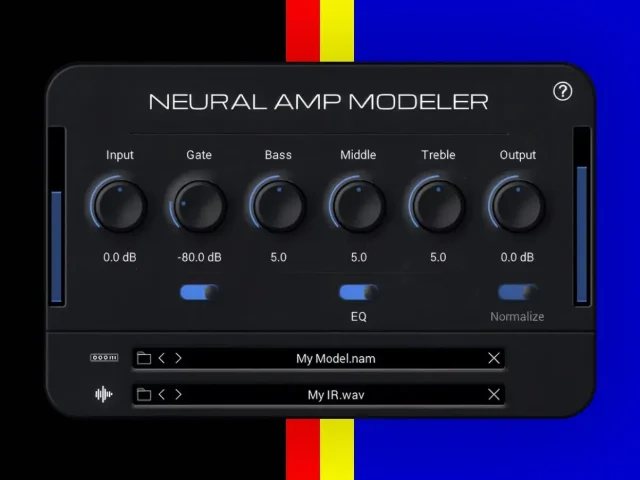
Insert the NAM plugin on your guitar track. Click the folder icon in the interface and navigate to wherever you saved your downloaded .nam files. Sites like Tone3000 host massive community repositories of these captures.
3. The Cabinet IR (The Crucial Step)
This is where beginners completely ruin their tone. You must understand the difference between the two types of NAM captures:
- Full-Rig Captures: The person capturing the tone mic’d up a physical speaker cabinet. The resulting model includes the amp, the speakers, and the microphone’s frequency response. If you load a Full-Rig
.namfile, do not add a cabinet impulse response (IR) after it. If you do, your tone will sound like it’s buried under three moving blankets because you are applying a cabinet EQ curve twice. - Head-Only (DI) Captures: The capture was taken directly from the amplifier’s speaker output (using a load box). It contains zero speaker characteristics. If you play this without an IR, it will sound like a swarm of angry digital bees. You must load a separate cabinet IR after a Head-Only NAM model. This is actually the ideal way to work, as it allows you to pair a boutique Plexi head capture with your favorite 1960B 4×12 IR, giving you total modular control over your sound.
Your track order should look like this: Clean DI Track → NAM Plugin → IR Loader (if Head-Only) → Output Meter.
Keep your original DI track clean and unprocessed. This allows you to swap out NAM models during mixing without ever having to re-record your performance.
Capturing Your Own Gear
If you have a collection of custom-built amps or a perfectly dialed-in pedalboard featuring an OCD overdrive and a sweet delay, you can immortalize them in digital form.
NAM isn’t just for amps; it captures distortion and overdrive pedals beautifully. To do this, you play a specific 48kHz, 24-bit test signal (a .wav file containing sweeps and noise) through your physical gear and record the output back into your DAW.
You then feed the original clean test file and your “amped” recorded file into the Neural Amp Modeler training software. While you can install the Python environment locally using Anaconda and PyTorch, the easiest method for most people is running the training script in a Google Colab notebook.
The key metric to watch during training is the ESR (Error to Signal Ratio). This number dictates how closely your new digital model matches your physical gear. An ESR around 0.1 is acceptable, but getting it down to 0.04 or lower means the digital clone is practically indistinguishable from the real thing. To get a low ESR, ensure your re-amped signal isn’t clipping your converters, and strictly bypass any time-based effects (like reverbs or delays) or noise gates during the capture process, as these will confuse the neural network.
Top NAM Questions According to Google
If you dive into the forums, you’ll see the same questions popping up repeatedly. Let’s clear the air.
Does NAM replace Kemper or ToneX?
Yes and no. It depends entirely on your workflow.
| Feature | Kemper | ToneX | Neural Amp Modeler (NAM) |
|---|---|---|---|
| Format | Dedicated Hardware | Hardware Pedal & Plugin | Free Plugin (Hardware emerging) |
| Cost | ~$1,500 – $2,000+ | ~$399 for pedal | £0.00 |
| Live Usability | Built for the stage, footswitches | Built for pedalboards | Requires a laptop/interface rig |
| Tone Quality | Industry standard | Excellent AI modeling | 99% accurate, often beats paid software |
If you are playing a sweaty grassroots venue and need to stomp on a physical switch to change from clean to heavy distortion without worrying about a laptop crashing, Kemper and ToneX hardware are designed for that abuse. However, if you are sitting in your home studio writing tracks, producing an EP, or laying down guitars for a mix, NAM costs absolutely nothing and objectively sounds just as good, if not better, than the premium alternatives.
Why is my NAM plugin making no sound?
This happens to everyone on their first day. NAM is a loader, not an instrument. If you don’t click the little folder icon and load a .nam model file into it, it has no math to process your signal with, resulting in dead silence. Make sure your track is armed, input monitoring is on, and a model is actively loaded.
Can NAM model my whole pedalboard?
It can easily capture your drive section—overdrives, fuzzes, distortions, and boosters translate incredibly well. However, NAM fundamentally cannot model time-based effects. Do not try to train a model with your delay, chorus, or reverb pedals engaged. The neural network will attempt to calculate the math of an echoing signal, panic, and spit out a broken, high-ESR mess. Capture your dry dirt tone, and run your favorite VST delay plugins after NAM in your DAW.
What is the difference between A1 and A2 Legacy models?
If you are browsing Tone3000, you will see tags for A1 and A2. Architecture 1 (A1) is the original engine that put NAM on the map. Architecture 2 (A2) is the newly optimized engine that runs more efficiently and delivers even higher accuracy. You can still download and use legacy A1 captures, but A2 is the current gold standard moving forward.
Do I need to buy expensive cabinet IRs?
No. While premium IR packs from companies like York Audio or OwnHammer are fantastic, there are thousands of brilliant, free impulse responses floating around the internet. A great DI capture of a roaring tube head paired with a solid, free SM57-on-a-Vintage-30 IR is all you need to lay down professional-grade tracks.
The barrier to entry for world-class guitar tone has officially been reduced to zero. Stop fighting with plastic-sounding amp sims, download NAM, dial in your gain staging, and get back to writing riffs.